
Setting up a simple Apache web server on Linux Ubuntu giving you an in-depth look into how web servers work. It’s also very useful for web developers to have a platform to test websites on or for hosting your own.
Lets talk about Apache web servers and Linux Ubuntu. In the world of web servers, you get some mainstream choices, such as Apache, NGINX, Lighttpd but in this tutorial we will be looking at setting up a simple production Apache web server. Apache has been around for decades and powers a good portion of the Web as we know it today…
We will also be installing PHP and MariaDB to work alongside the Apache Web server.
Things you will need to setup the Apache web server on Linux Ubuntu
A static IP, also known as a public IP address. most of the time, home users might not be able to host a web server from home either because their ISP (Internet service Provider) does not allow it or your IP address is dynamic, meaning it changes every 6 to 12 hours. Servers need a fixed IP that can be routed to the internet so that your domain name that points to the IP is always the same. A static IP never changes therefore DNS (Domain name Services) will always point to your Apache web servers address.
A Domain Name. This is crucial for a Apache web server to function, If you plan to use the server on your local network only then you can create your own DNS records that point to the Apache web server but the internet wont be able to make use of this server.
A Server PC running Linux Ubuntu. You can use pretty much any Linux distribution but we will be using Linux Ubuntu Server 22.04 LTS for this tutorial. Linux Ubuntu server edition does not have a Graphical Interface and we will be using the Command line for everything. You can however always install a GUI if you like but for the most part its not needed as you will see.
A Router that will allow for port forwarding, In order for the internet traffic to reach your Apache Web server you will need to be able to setup and forward a few ports, such as port 80, 8080 and 443. These ports are used by Apache and most common web servers to allow traffic to be redirected to the server once it enters your network.
Lets start by downloading Linux Ubuntu and installing it.
Step #1 – Downloading Ubuntu and Rufus
Download Linux Ubuntu 22.04 LTS Server iso from Canonical here
On the Canonical Website select Option 1 – Manual Server Installation then, Select Download Ubuntu Server.
Step #2 – Preparing Linux Ubuntu installation medium via flash drive
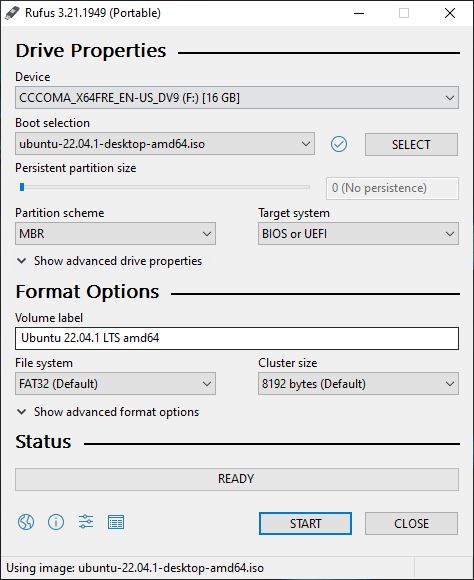
First we need to prepare Ubuntu for installation using a flash drive. Plug in your flash drive on a windows PC not on the Web server PC then, using Rufus select the USB flash drive and the Ubuntu Server ISO image you downloaded as shown below. Then press start to copy the ISO files to the flash drive and make it bootable.
Step #3 – Installing the Linux Ubuntu operating system from the flash drive on our Apache Web server
Once Rufus is done we can move over to the Web server an load its operating system. Plug the flash drive into the USB port and power on the Apache Web server PC.
We will need to boot from the flash drive and to do so I’d highly advice consulting your motherboard manufacturer documentation. Most PC’s will have a shortcut key such as F2, F9, F10 or F12 to bring up a boot menu. Else you will need to configure the BIOS or UEFI to boot from flash drive. If you are using a UEFI bios, disable secure boot first to be able to boot from a flash drive…
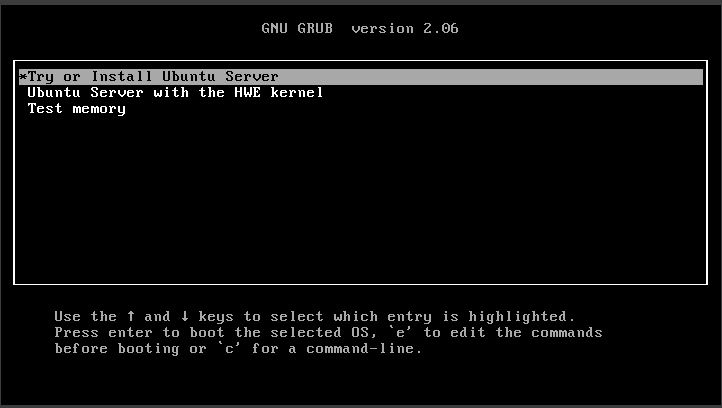
You will know you have successfully booted to the Linux Ubuntu Instraller when you reach the Ubuntu Installer screen
After selecting your Language the Installer will ask you which installer to use, the old one or the new one. We went with the new one.

From there follow the Ubuntu installer to install the Ubuntu OS on the Apache server PC. It’s pretty straight forward and will only take about 20~30 minutes depending on your internet connection and Web server’s hardware.
Settings to pay attention too:
- Use the Default install for the Ubuntu server. For this tutorial we will be also using that option in the Ubuntu server setup
- You can skip setting up LVM and Disk Encryption. it’s optional.
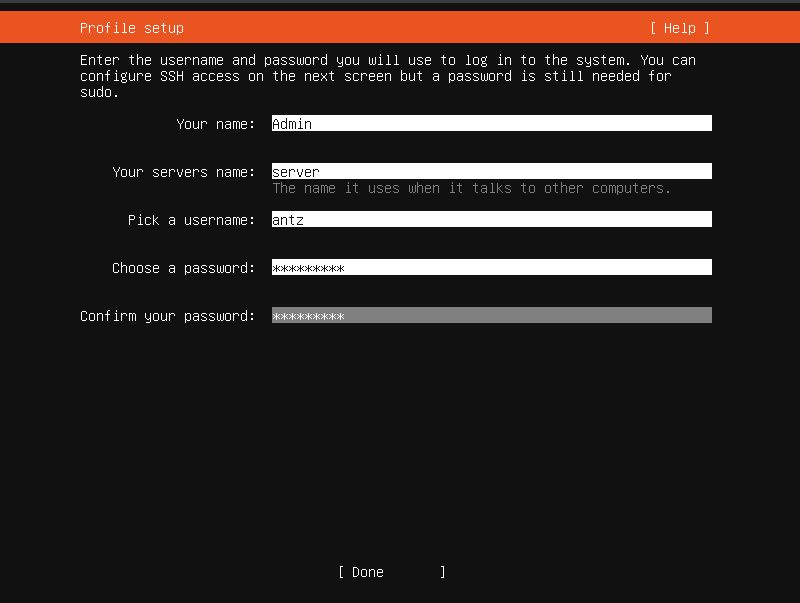
- Set your Apache web servers name to server in the field. As indicated below.
- Skip Ubuntu Pro, it’s a paid service.
- Do install OpenSSH, useful to access the server from another computer.
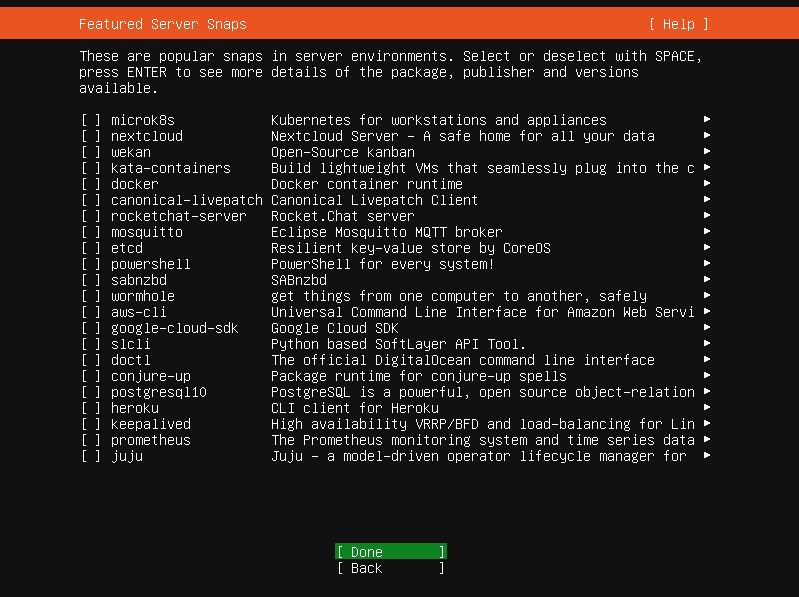
- Skip Automatic server roll and features snaps.
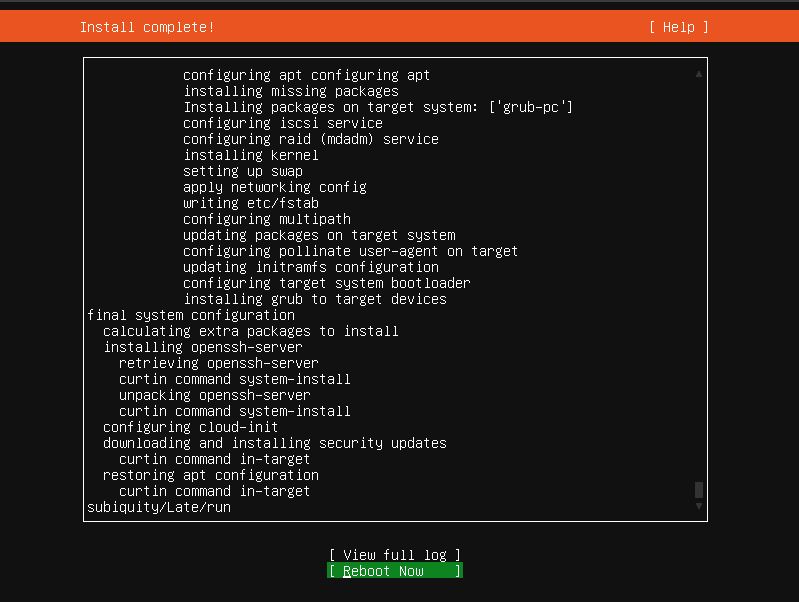
When you reach the end of the installation you will be greeted with this screen as shown below. Restart the system and remove the USB flash drive.
Step #4 – Getting the Linux Ubuntu operating system ready to be an Apache Web Server
The very first thing we want to do after installing Ubuntu is update the system. This will ensure that any software we install is the latest versions and will help with security and stability of the overall Apache Web server. To update Ubuntu server and it’s software packages type in the following command or copy and paste it then hit enter.
sudo apt update && sudo apt upgrade -yStep #5 – Setting up a static IP Local address on Ubuntu 22.04 Apache Web Server
Next we need to configure a static IP address for the server, By default the IP will be most likely come from your internet router and this will change which will cause issues down the line. By assigning a static IP address to the Web server we tell the router not to hand out an IP address and instead that the Apache web server will provide its own IP address that will not change automatically. Let’s setup a static IP now. Type in and run the following commands
nmcli connection showTake note of the DEVICE name that gets listed. next we will need to edit the following file. This is applicable to Ubuntu 22.04 LTS as of this writing, older versions of Ubuntu and future version might implement different ways of assigning static IP addresses.
sudo nano /etc/netplan/01-network-manager-all.yamlMake the following changes to the file as shown below.
Step #6 – Configure Netplan on the Linux Ubuntu Apache Web Server
Be sure to mind the indentation, Netplan is actually terrible to work with and if your tab spacing in the configuration file is incorrect it will not work.
network:
  renderer: networkd
  ethernets:
    enp0s3:
      addresses:
        - 192.168.10.200/24
      nameservers:
        addresses: [192.168.10.1, 8.8.8.8]
      routes:
        - to: default
          via: 192.168.10.1
  version: 2
Take note for Ubuntu Desktop we set the renderer to NetworkManager and on Ubuntu Server we set the renderer to networkd.
If you are using Ubuntu desktop you can get more information Setting up a simple NAS server on Linux Ubuntu and How to Setup a home network
In the above file we have used following configurations
- enp0s3 is the interface name (yours might differ so check with nmcli connection show command )
- addresses are used to set the static ipv4 and the /24 is the netmask.
- nameservers used to specify the DNS server IP address’s
- routes used to specify the default gateway (this is your router’s IP most of the time)
Note: Please change the IP addresses and interface name as per your environment For this Example I am using the following values that you need to change
- 192.168.10.200 as my Static IPv4
- /24 as my netmask, this one most likely will be the same for you as well.
- Name Server addresses DNS 192.168.10.1 (My routers DNS) and 8.8.8.8 (Google DNS) as a fallback
- Route needs to be set as your routers IP. in my case its 192.168.10.1
Save the file by pressing CTRL+X then y and finally press enter
Apply the changes by running the following command.
sudo netplan applyStep #7 – Testing your network settings
Verify that you have internet and that everything is working. you can ping google using the following command in terminal.
ping -c 4 www.google.comPING www.google.com (172.217.170.36) 56(84) bytes of data.
64 bytes from jnb02s03-in-f4.1e100.net (172.217.170.36): icmp_seq=1 ttl=119 time=7.19 ms
64 bytes from jnb02s03-in-f4.1e100.net (172.217.170.36): icmp_seq=2 ttl=119 time=5.88 ms
64 bytes from jnb02s03-in-f4.1e100.net (172.217.170.36): icmp_seq=3 ttl=119 time=16.6 ms
64 bytes from jnb02s03-in-f4.1e100.net (172.217.170.36): icmp_seq=4 ttl=119 time=5.34 ms
--- www.google.com ping statistics ---
4 packets transmitted, 4 received, 0% packet loss, time 3030ms
rtt min/avg/max/mdev = 5.337/8.741/16.558/4.562 ms
Look for the number of packets that was received which should be and 0% loss which is good. At this point networking should be done.
Step #8 – Mapping local IP addresses to DNS names in the hosts file
Apache will need to reference Websites and their names on the Web Server, We will need to add a few entries in the hosts file. The hosts file holds Local DNS records that maps IP addresses to domain names. In your console open the hosts file for editing
sudo nano /etc/hostsYou should see the file content as such:
# The following lines are desirable for IPv6 capable hosts
::1     ip6-localhost ip6-loopback
fe00::0 ip6-localnet
ff00::0 ip6-mcastprefix
ff02::1 ip6-allnodes
ff02::2 ip6-allrouters
At the very top above the comment we will make some changes. We need to insert our servers Local IP address and point it to the server name we picked. in this case server.demodomain.com, Replace demodomain.com with your own domain.
We will also need to add a friendlier name for our website, such as www.demodomain.com. Later we will setup apache to use virtual Servers and one of them will be www.demodomain.com as we want people to access our website with www.demodomain.com and not server.demodomain.com
For a FQDN make sure you set the first entry in this file to the servers name plus the domain name E.g. server.demodomain.com
127.0.0.1       server.demodomain.com www.demodomain.com demodomain.com localhost server
192.168.10.200  server.demodomain.com www.demodomain.com demodomain.com

# The following lines are desirable for IPv6 capable hosts
::1     ip6-localhost ip6-loopback
fe00::0 ip6-localnet
ff00::0 ip6-mcastprefix
ff02::1 ip6-allnodes
ff02::2 ip6-allrouters
Lets also make sure that the host name for our Apache Web server is setup correctly. in the console type in:
hostname -fYou should see a single line that is your servers name followed by the domain name. This is also called a FQDM or Fully qualified domain name, in this case its server.demodomain.com Yours should match your domain name. If its incorrect you can edit the hostname file with the following command.
sudo nano /etc/hostnameAnd made sure you set your Apache web server’s name to server in the host file then double check the /etc/hosts file and make sure the first entries are set to use server.demodomain.com, remember to replace the domain here with your actual domain name.
After making changes re-run hostname -f to make sure it is setup correctly. This is a crucial step to ensure that your Apache web server will function correctly.
Step #9 – Installing Apache, PHP and MariaDB on the Apache web server
Its time to install the software packages we need to turn this Ubuntu install into a Apache Web server. Thus we install the required software packages as follows:
sudo apt install apache2 php php-mysql mariadb-serverLets break down the packages we are installing for the Apache Web server
- apache2 is the actual Apache webserver package
- PHP is a server side script that is widely used by many websites
- php-mysql makes sure that PHP can use a database service in this case mariaDB which is the opensource alternitive to MySQL but you can use MySQL if you choose
- maria-db-server is a database service that is used by the webserver and more advances websites to store and serve information such as user accounts and other information.
After installing and restarting the server you can open up a browser window and navigate to the Apache Web Server’s IP address, this will be the local LAN (Local area network) IP address, if all went well you should see the following basic website pop up.

Step #10 – Setting up the first website on the Apache web Server
by Default on Ubuntu servers Apache stores the website files int he /var/www/html folder. This folder is only writable to users belonging to the Apache group. to make things simple we will add our user account to that group so we can make changes to the website files. The following command will ad your Username to the www-data group, www-data is the group used on Unbuntu servers and distro’s for Apache.
 sudo usermod -a -G www-data $USER
 sudo chown -R $USER:www-data /var/www/html/
To verify you belong to the group you can then type into the console groups $USER or groups <Username> where <Username> is your actual user name. In the list returned you should see the www-data along with others like sudo and cdrom etc.
You can now write and place website files into that directory.
Now, if you only plan on using the web server for a single website then you are almost there. You can use the directory /var/www/html to host your files. However if you want a more robust server that will host multiple websites you will need to make use of virtual hosts provided by Apache web server. You can view our Virtual Hosts tutorial here Setting up Apache virtual hosts on Linux Ubuntu server
Step #11 Testing php on the Apache web server
Lets test and make sure php is working with apache. To do this, navigate to the apache web directory where the website files are located.
cd /var/www/htmlNext, create a new file called info.php in that directroy using the following command
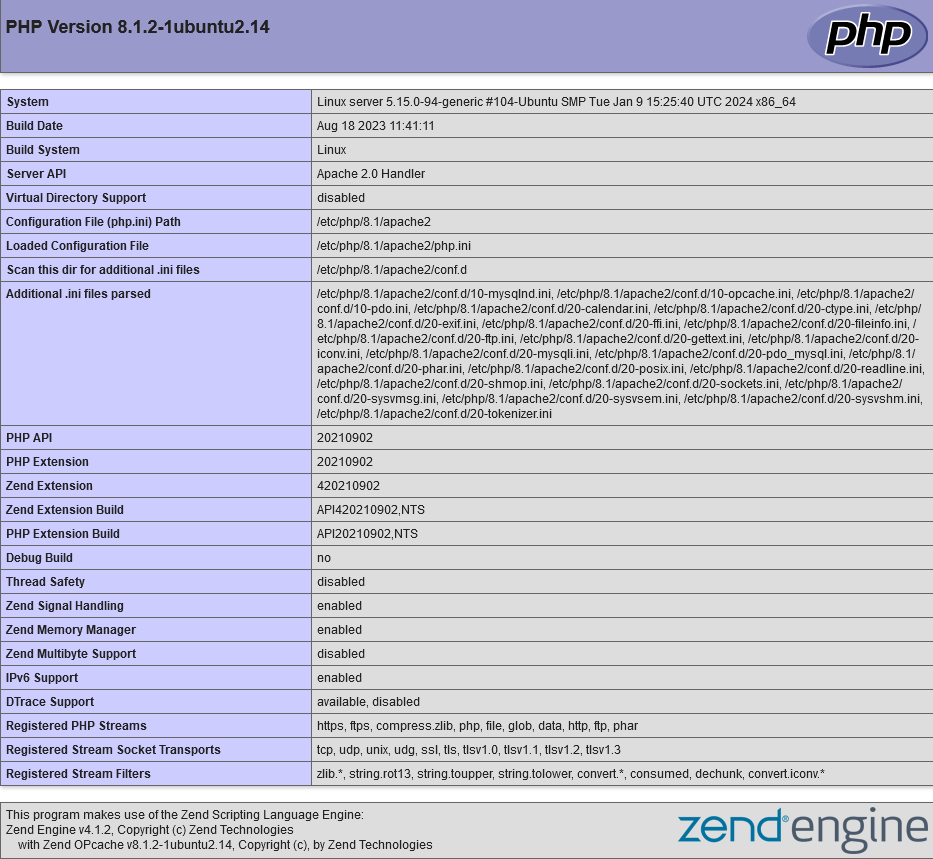
touch test.php && nano info.phpWe will now write a simple php server script to get all the information about the current php installation on the server. Copy or write the following line of code and save the info.php file.
<?php echo phpinfo(); ?>Save and close the file. Using nano press ctrl + x then y followed by enter to accept and save the file.
In your browser on a different computer as before navigate to the Apache Web server’s address flollowed by the /info.php to call that page. E.g
http://192.168.10.200/info.phpif you have done this correctly you will be greated by the PHP information page which looks something like this.
Step #12 Setting up mariaDB on the Apache web server
Before we do anything we need to first set a MySQL username and password. In terminal run the following command
sudo myssql -u root -pAfter getting ot the MySQL command prompt setup a new user with a password making sure you take note of the passwork and username you use here. For this example i will be using admin and the username on localhost and a good strong password. Remember this password though as we will need it later.
CREATE USER 'admin'@'localhost' IDENTIFIED BY 'some_very_complex_password';next we need to grand all priviladged for this user, to do that while still in the MySQL console execute the following commands line by line.
GRANT ALL PRIVILEGES ON *.* TO 'admin'@'localhost' WITH GRANT OPTION;
FLUSH PRIVILEGES;
exit
Step #13 Making it easier to manage MySQL/MariaDB on the Apache web server
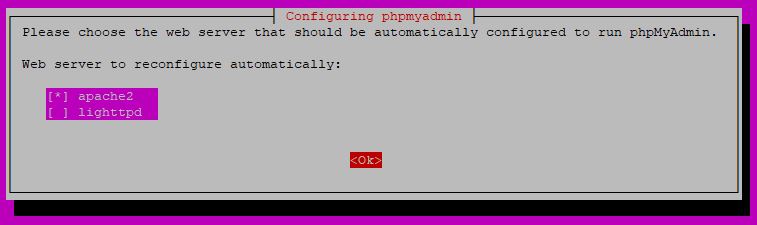
To make things easier to maintain, manage and work with MySQL / MariaDB we will be installing phpmyadmin. Its a web based front end used to easily create, manage and work on databases for your webserver. To install phpmyadmin run the following command
sudo apt install phpmyadminDuring the installation you will be asked to provide which web server you are using. Make sure you select the apache option using <space bar> to tick an asterix next the apache option then <tab> to navigate to ok then again <space bar> to continue the instalation of phpmyadmin
When phpmyadmin asked to configure a default database press ok to have it do so. Next you will need to setup a SQL password for phpmyadnin to use. when promted to do so, enter your MySQL password for the admin account you created earlier and continue. Confirm the password one last time and then finish the installation.
Now you can again using your browser navigate to the servers IP followed by /phpmyadmin to access the web dashboard E.g
http://192.168.10.200/phpmyadmin/Using your MySQL Credentials you can now login and manage databases.
Getting the apache web server onto the Internet
At this point you have a basic webserver setup. To give it access to the internet and have people visit it, you will need to point your domain (DNS) A record to your public static IP provided by your ISP and then forward your apache server’s port 80 TCP, 8080 (Optinal TCP) and 443 (TCP) to your web servers internal Static IP address.
In this case that would be 192.168.10.200 as per this tutorial. This we will cover in another tutorial as it can become really complicated really quick.
Some things to take into consideration when messing with web servers.
Though this tutorial provides you with the basics of setting up a Ubuntu Apache web server it is risky business to make it availble to the Internet. Proper security and precausions need to be in place before you attempt to do that. Additionally SSL needs to be implemented as well as good firewall, and other implementations.
Web servers are fun to play with and can help you if you are a web developer to develop and test the sites in house without making it avalible to the Internet by simulating a production level server. But to manage and run your own internet facing server is a lot of work and requires good knowlege of networking, Linux systems and cyber security practices… Most of the time it’s best to rather just rent a server from a provider and have them deal with the technicalities on your behalve.
You can also look at something like XAMPP
XXAMPP is a opensource project used to deploy a simple weserver on a Windows PC for use as a developer to test and use. It makes use of tools we used in this tutorail as well such as phpmyadmin. It might be easier to get going with that if you quickly need a local webserver.


Pingback: Setting up Apache virtual hosts on Linux Ubuntu server - Micro Fusion Insight
Pingback: Setting up a simple virtual machine to run Windows 11 - Micro Fusion Insight
Pingback: Setting up a simple Windows FTP server using FileZilla - Micro Fusion Insight